An estimate is the priced proposal you send a customer before the work happens. When they accept it, you can turn it straight into a scheduled job, so it is worth filling in properly the first time.
The video above walks through a complete estimate start to finish. The same steps are written out below.
Before you start
Two things make estimates much faster, and both are one-time setup:
- Your services list. Every service you sell, with its price. When you pick a service on an estimate the price fills itself in, so you are not typing numbers from memory. Set these up under Settings → Services & Items.
- The customer and their property. You can add a customer while writing the estimate, but if they are already in the system with their address saved, the estimate takes about a minute.
Write the estimate
- Go to Estimates and click New Estimate.
- Choose the customer. Click Select a customer... and start typing their name. Pick them from the list.

- Choose the property. Pick the address where the work happens from the dropdown underneath. A customer can have several properties (a house and a rental, say), and the one you pick is the address the crew will drive to.
- Add an introduction (optional). This is a short, friendly paragraph at the top of the estimate. The customer sees it both on the estimate and in the email. Something like “Thanks for having us out. Here is the quote for the maple by the driveway.” is plenty.
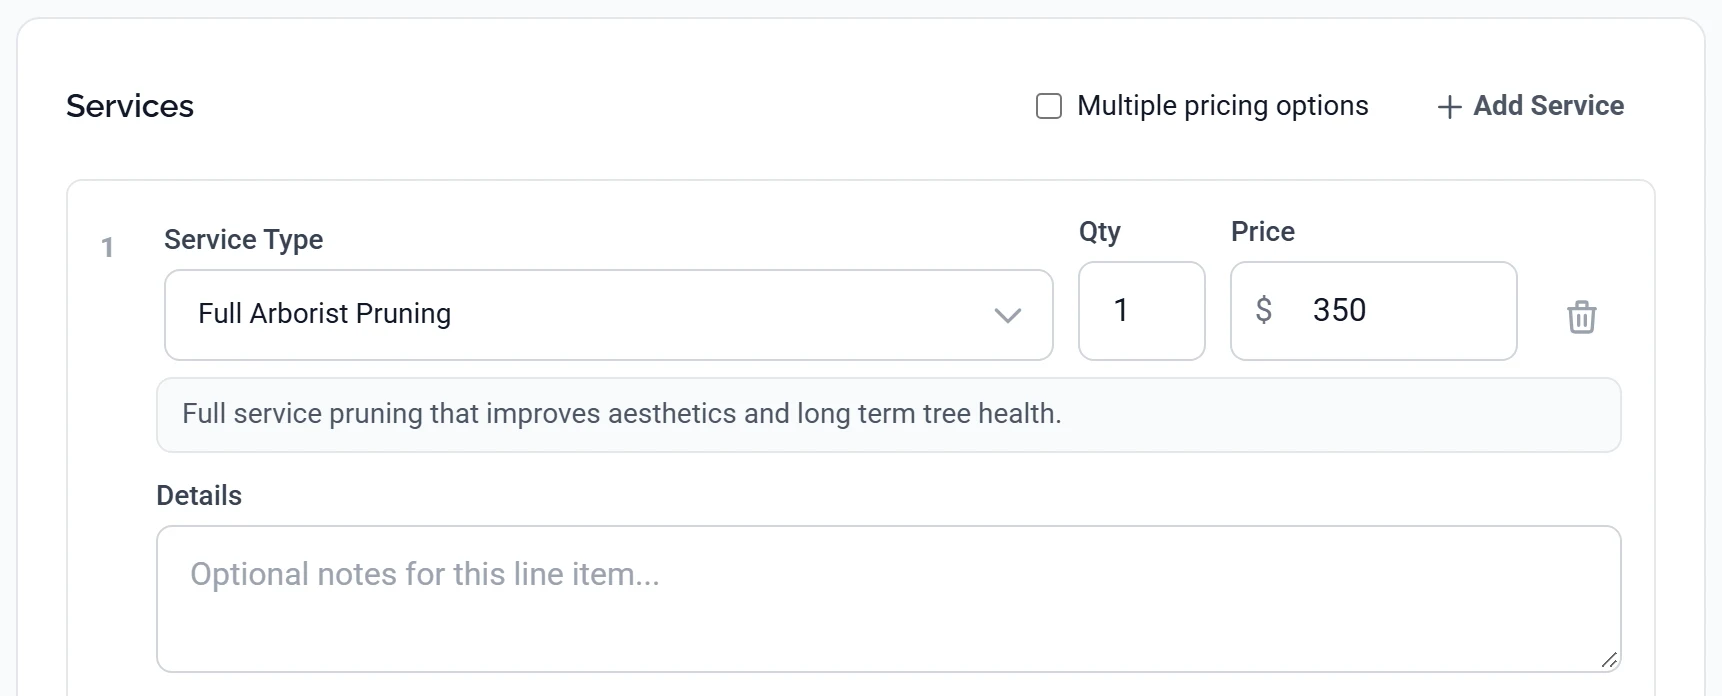
- Add the work. In the Services section, click Select service.... Your full services list opens. Type to narrow it down, then click the one you want. The price fills in automatically.
- Describe what you are actually doing. Each line has a details box under it. Use it. A line that just says “Full Arborist Pruning” tells the customer nothing about which tree or what you will do to it. “Large blue spruce in the front yard. Deadwood removal and crown clean.” tells them exactly what they are buying.
- Add more lines for any other work on the same visit. Each one gets its own service, price and details.
- Check the total. The running Subtotal and any discount sit at the foot of the Services card, and the Summary panel on the right shows the customer, the number of services and the Total. Both update as you type.
- Click Save Draft. The estimate is saved but nothing has been sent to the customer yet.
Nothing is sent until you send it. Saving a draft is private to you. The customer only sees the estimate once you send it, so you can leave one half-finished overnight and come back to it.
Notes and terms: which ones the customer sees
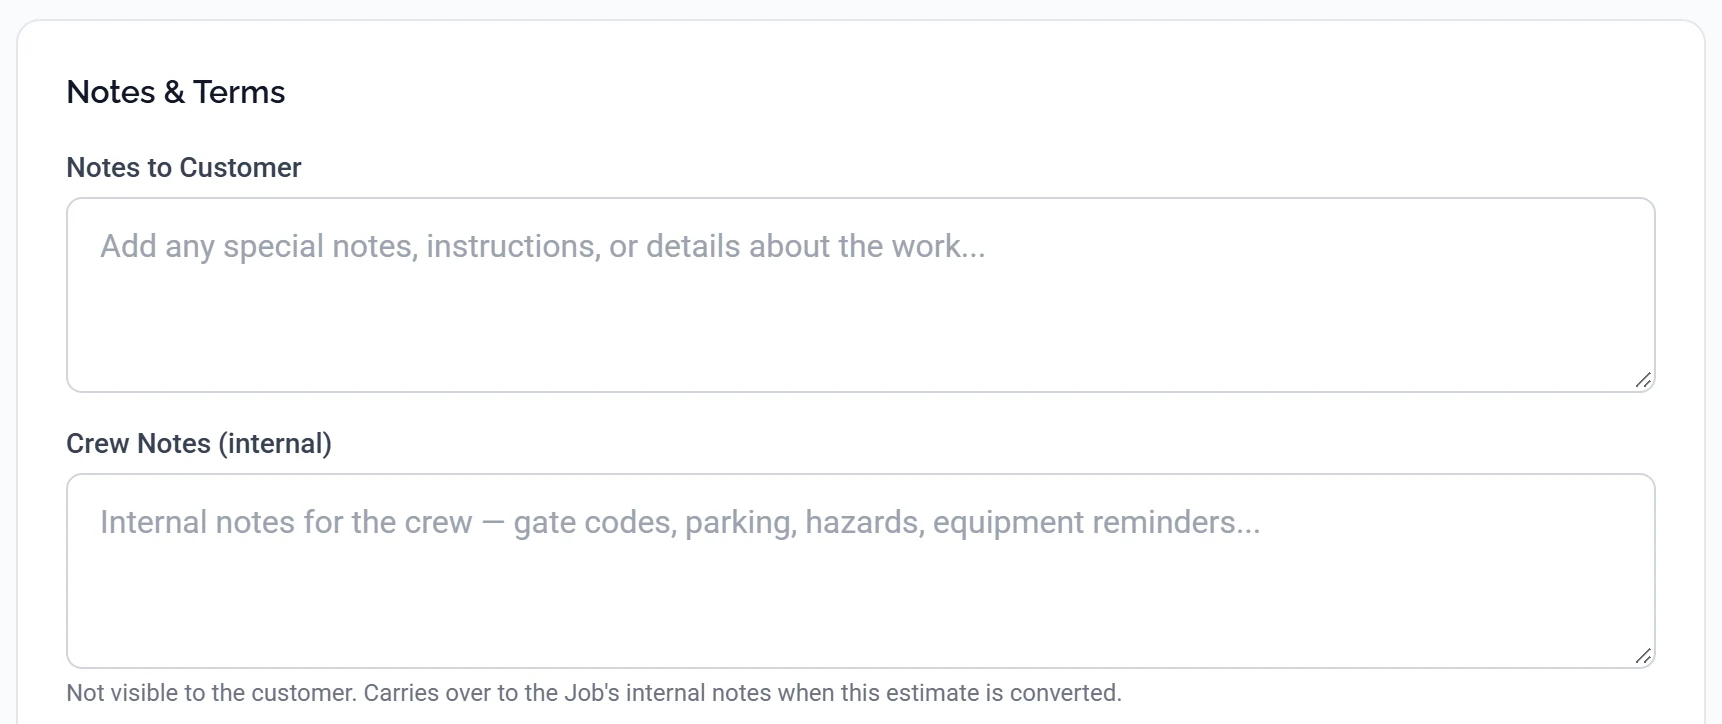
This is the single most common mistake on estimates, and it is worth thirty seconds of your attention. Near the bottom there are two note boxes that look almost identical and go to completely different people.
| Box | Who sees it | Use it for |
|---|---|---|
| Notes to Customer | The customer, on the estimate and in the email | What is included, what happens to the debris, how long it will take |
| Crew Notes (internal) | Only your team, in the dashboard and mobile app | Gate codes, where to park, the dog, the neighbour who complains |
Double-check before you send. Crew notes are internal, but only because you put them in the right box. Anything you type into Notes to Customer is printed on the estimate the customer receives.
Terms & Conditions sits below both and prints at the bottom of every estimate. Set your standard terms once on the Estimates page, under its own Settings tab, and every new estimate starts with them. You only need to touch this when a particular job needs something different.
Preview it before you send
Click Preview Estimate, at the bottom of the Summary card on the right, to see the estimate exactly as the customer will: your logo, your colours, your terms. It is worth looking at the first few you write, because it is the fastest way to spot a line with no description or a price that came out wrong.
Sending it
You have two ways to send. From the form you are already on, Save & Send saves the estimate and sends it in one step. If you saved a draft earlier and have come back to it, open the estimate and use Send to Customer on its detail page.
Either way the customer gets an email with a link to view the estimate in their portal, where they can read it, ask a question, and accept or decline it. You will see the status change on the estimates list as they do.
Common questions
Can I offer something as an upsell rather than including it?
Yes. Mark the line optional and the customer chooses whether to add it, with the total updating as they tick it. See Making a line item optional.
How do I knock money off?
You can discount the whole estimate or individual lines. See Applying a discount.
Can I reuse an estimate I have already written?
Yes. Open an existing estimate and use Duplicate to copy it onto a new customer, then adjust the lines. For work you quote constantly, save it as a template instead so it is available from the New Estimate screen.
What if the customer wants a change after I have sent it?
Edit the estimate and send it again. The customer sees the current version, and the estimate keeps a history of what changed and when, so there is a record if it is ever disputed.
What happens when they accept?
The estimate is marked accepted, you are notified, and you can convert it into a job with the customer, property, services and prices already filled in. If you use QuickBooks, the accepted estimate syncs across too.